 Exposure Blending is an old technique used in the dark room to darken the high light and lighten the shadow. It usually involved two photographs of the same theme taken at two different exposures. We can now do Digital Exposure Blending on computer with Software such as Photoshop. The upper picture was blended using two photographs. One was taken +o.7 EV, the other was taken -1.3 EV from a spot reading of the blue color. I did the high speed exposure bracketing hand-held with aperture priority. The lighter image, which gave good color of the subject, was used as background and the darker image, which had correct exposure for the sky, was pasted onto it as Layer 1. I still have to reposition the two layers to ensure that they overlay perfectly. A mask was created on Layer 1 and the background image was copied to the mask (it became black & White, as all Photoshop user should know). Gaussian blur was applied to the mask with a Radius of 30. It was done. The Gaussian blur added to the mask gave an interesting texture to the subject. We can also not applying the Gaussian blur, but in the mask, paint
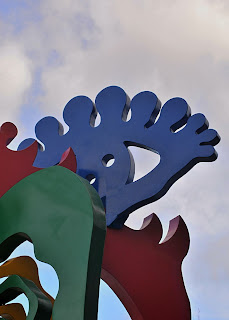 ed the subject to completely black and the sky completely white, then the final image will really be the subject 100% from the lighter image and the sky 100% from the darker image.
The lower picture was taken at -0.3 EV. The sky was too light and the red too dark. Selectively darkening the sky and lightening the red subject in Capture NX, I had a very good image in a few minutes. The sky for the lower image was deliberately made lighter. Quite amazing how much information the modern digital camera can capture that we can extract them out latter using computer software.
No comments:
Post a Comment